
A Beginner-Safe Route to a Smooth At-Home Dip Manicure
Two thin color layers are a practical beginner starting point. A third can add opacity or structure when your system permits it.
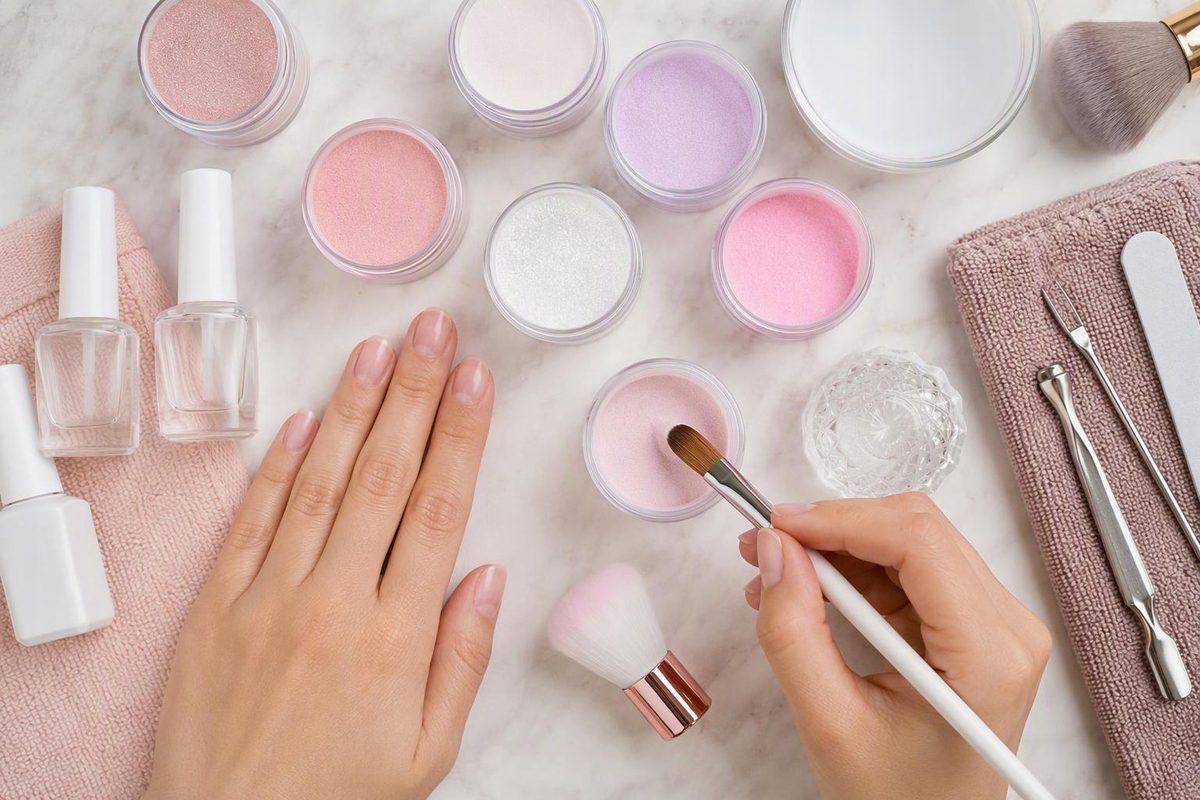
Learning how to do dip powder nails is less about copying one brand’s timer and more about understanding the sequence. Prepare the natural nail gently, apply compatible resin and powder in thin layers, activate the coating, refine it only after it hardens, and finish with the top coat specified by your system.
Dip kits are not standardized. One may include primer and foundation powder; another may omit both. Some call for two activator applications, while others use a different liquid order. Treat the steps below as a brand-neutral framework, but follow your kit’s labeled directions whenever its sequence, timing, or products differ.
How dip powder works—and why your kit’s directions come first
A conventional dip manicure combines a glue-like resin or base coat with finely milled acrylic powder. The resin captures the powder, repeated layers build color and structure, and a liquid activator hardens the coating.
A typical sequence is:
- Prepare the natural nails.
- Apply bond, primer, or dehydrator if required.
- Apply a thin base or resin coat.
- Add powder while the base is receptive.
- Remove loose powder and repeat with thin layers.
- Apply activator.
- Shape and smooth the hardened coating.
- Apply a second activator coat if directed.
- Seal with the system’s top coat.
This overall structure is widely shared, but the chemistry and bottle order are not universal. Foundation powder, clear encapsulating powder, primer, sealing coats, activation intervals, layer counts, and top-coat techniques all vary. A timer or product order copied from another brand is not a reliable substitute for the instructions supplied with your kit.
Standard dip liquids harden through the activator and do not require a UV or LED lamp. Conventional dip should not be confused with a gel-liquid powder method, which uses gel products and requires lamp curing. This overview of dip and gel application explains the separate curing methods, while our guide to how gel polish cures covers the lamp-cured process in more detail.
Do not add a lamp to a conventional dip system to make it harden faster. Conversely, do not expect a lamp-cured gel product to harden correctly in air. Use the process intended for the liquids in front of you.
Dip usually creates a harder, thicker, and more rigid coating than gel polish. That rigidity may feel protective during wear, but it does not biologically strengthen the natural nail. It also makes application control important: thin layers help limit excess bulk and are easier to refine than one heavy coat.
Dip powder supplies: essentials, optional extras, and what each product does
Start with compatible products from one kit or system. Because formulas, bottle orders, and activation intervals differ, do not assume liquids from unrelated brands are interchangeable.
Core system products
- Base or resin: The adhesive liquid that captures the powder.
- Dip powder: Supplies color and helps build the coating’s structure.
- Activator: Hardens the completed resin-and-powder layers.
- Top coat: Seals the surface and creates the final finish.
Core preparation and finishing tools
- Cuticle pusher or orangewood stick
- Natural-nail file
- Gentle buffer
- Clean dust brush
- Lint-free wipes
- The preparation liquid specified by the system, such as isopropyl alcohol
- A clean disposable or personal-use container if you plan to dip
- A separate catch container if you plan to pour powder over the nail
The following products are common but optional or system-dependent:
- Bond or primer
- Dehydrator or prep liquid
- Foundation powder
- Clear encapsulating powder
- Final sealing resin
- Brush saver
- Cuticle or nourishing oil
- Cotton and foil for removal
- Electric file
Foundation powder creates an underlying structure in systems designed around it. Clear powder may protect a color, glitter, or textured finish before filing. Do not add either product unless your system calls for it.
Brush saver should be used only when it is compatible with the liquid system and applied as directed. Cuticle oil belongs after the top coat has fully dried or after removal—not on the nail plate immediately before application.
A hand file and buffer are sufficient for a beginner.
Before opening the liquids:
- Arrange the bottles in the order required by the kit.
- Protect the work surface and choose a place where dust can be contained.
- Keep a clean dust brush and lint-free wipes within reach.
- Set out fresh single-use materials.
- Prepare a personal portion of powder if you will dip.
- Use a separate container to catch powder if you will pour it over the nail.
- Keep open powder and bottle necks away from filing debris.
- Allow enough uninterrupted time to complete activation and finishing.
Good organization supports the one-nail-at-a-time process and reduces the chance of touching wet resin while searching for a tool.
Before you begin: nail condition, hygiene, and gentle preparation
Check the nails and surrounding skin before applying product. Do not cover:
- Cuts or broken skin
- Inflamed or notably irritated tissue
- A suspected nail or skin infection
- A nail separating from the nail bed
- A substantially thinned nail plate
- A painful or visibly damaged nail
Leave an uncertain or damaged area uncovered.
Remove existing nail products completely. Shape the free edge with a hand file, then clean beneath the nails gently. Avoid forceful scraping or digging into the surrounding folds.
Push the cuticles back carefully with a pusher or orangewood stick. Remove only loose, nonliving material attached to the nail plate. Beginners should not cut live cuticle tissue: cuticles help protect the growing nail area, and accidental cuts create an avoidable route for infection. The University of Miami Health System’s nail-safety guidance recommends gentle cuticle handling and avoiding aggressive cleaning beneath the nails.
Lightly buff away surface shine. The endpoint is an evenly matte surface—not a visibly thinner nail. Use light pressure, stop once the shine is gone, and do not repeatedly file one area to remove natural ridges.
Brush away all dust. Then use the preparation method specified by the kit, which may involve a nail-prep liquid, isopropyl alcohol, or another system-compatible product. Let the nails dry completely before applying base.
Commercial instructions differ on whether to wash immediately before application. Regardless of the method, the practical endpoint is the same: the nail plate should be fully dry and free of oil, dust, lotion, and residue.
Powder handling also matters. Instead of placing multiple people’s fingers into one jar:
- Sprinkle powder over the wet nail into a separate catch container; or
- Transfer enough powder for one person into a clean disposable or personal container.
Do not return powder that has contacted a nail to communal stock. Shared powder containers can create cross-contamination concerns, so use a fresh personal portion or a pour-over method when supplies may serve more than one person. Allure’s discussion of dip sanitation cites infectious-disease guidance against communal dipping pots.
Clean reusable tools appropriately according to their material and manufacturer instructions. Use fresh wipes, sticks, cotton, and other single-use items where appropriate. Personal tools still need to be cleared of filing debris, contacted powder, and old product between manicures.
Choose a workspace where filing dust and loose powder can be contained. Keep your face away from dust, close containers when they are not in use, and avoid strong drafts that scatter powder.
Step-by-step: apply thin base and powder layers
Read the complete kit instructions before starting. Identify whether your system requires primer, bond, foundation powder, clear powder, edge capping, or a final resin layer.
1. Apply any required prep liquid, bond, or primer
Use only what the system directs and keep it off the skin. Apply a controlled amount rather than leaving a wet, pooled layer around the cuticle.
2. Work one nail at a time
Apply powder immediately after coating each nail with base. This makes it easier to cover the wet area evenly and keeps the process controlled.
3. Apply a thin, even base layer
Use enough resin to cover the intended area without flooding it. Leave a narrow, clean margin around the cuticle and sidewalls. The brush should glide over the nail rather than push a bead of product toward the skin.
If resin touches the skin, clean the perimeter before adding powder. Do not leave product bridging the nail plate and surrounding skin.
For a graduated cuticle margin, stop the first structural or color layer slightly farther from the cuticle. Bring each later thin layer a little closer without touching the skin. This keeps every layer from accumulating in exactly the same area.
4. Apply the powder
Choose one of these methods:
- Personal-portion dip: Lower the nail into a fresh personal portion at approximately a 45-degree angle, then withdraw it without dragging it through the powder.
- Sprinkle or pour over: Hold the nail above a separate catch container and distribute powder over the entire wet area.
The approximate 45-degree technique appears in several product-specific tutorials, so use it only when it suits your chosen system’s instructions. The Dipalicious application guide illustrates how brand instructions can combine dipping or pouring with two or three product-specific coats.
Choose according to control, hygiene, and acceptable product waste. Do not return contacted leftovers to communal stock.
Keep the finger relaxed and avoid pressing the nail against the bottom or sides of the container. Let the powder settle onto the resin instead of compressing or scraping the coating.
5. Remove excess at the correct time
Tap off loose powder gently. Wait for the interval required by your system, then use a clean, soft brush to remove powder that has not adhered.
Check the sidewalls, cuticle margin, and underside of the free edge before continuing.
6. Repeat in thin layers
Apply another even resin coat, keep it off the skin, and add powder again.
Two thin color layers are a practical beginner starting point, while some product systems permit a third coat for opacity or additional structure. Because two-to-three-coat directions are product-specific, follow your kit’s stated limit rather than treating either number as universal.
If the color looks patchy, add another thin, system-approved layer instead of applying one heavy correction coat.
7. Seal the free edge if directed
Capping the free edge means carrying a controlled amount of product across the tip. Do this only when instructed, and avoid creating a thick ridge beneath or around the edge.
8. Add foundation or clear powder only when required
Some systems begin with foundation powder, occasionally using an initial layer that covers only part of the nail before extending later coats closer to the cuticle. Other systems apply color directly over the prepared nail.
Clear powder may be used to encapsulate color, glitter, or texture before shaping. It is not a mandatory final powder layer in every dip manicure.
| Stage | What to do | Purpose | Main mistake to avoid |
|---|---|---|---|
| Base application | Apply a thin, even resin coat with a clean perimeter | Creates the adhesive layer | Flooding the cuticle or leaving thick patches |
| Powder application | Dip into a personal portion or sprinkle over wet base | Adds color and structure | Dragging the nail through powder or missing wet areas |
| Excess removal | Tap, wait as directed, then brush away loose powder | Prevents grit between layers | Brushing too early or leaving loose powder behind |
| Repeat layer | Add another thin resin-and-powder coat | Builds opacity gradually | Correcting patchiness with one heavy coat |
| Edge sealing | Cap the tip if directed | Completes coverage at the free edge | Making the tip much thicker than the nail |
Inspect the perimeter before activation. Remove stray product while the area is still manageable rather than planning to file hardened material away from the skin later.
Activate, shape, smooth, and seal the manicure
Apply activator over the complete layered coating according to the kit’s directions. Cover the center, sidewalls, cuticle-side margin, and free edge without flooding the surrounding skin.
There is no universal activator timer. Product-specific instructions in the supplied commercial guides range from approximately 30 seconds to several minutes. For example, SNS uses multi-minute activation intervals within its own foundation-and-color system, but those timings should not be transferred automatically to another formula.
Before substantial filing, the coating should be fully hardened, with no obviously soft or gummy areas. If part of it remains soft, do not press harder with the file. Recheck the instructions, allow the specified interval, and add activator only if your system directs you to do so.
Once the coating has hardened:
- Refine the free edge with a hand file.
- Gently smooth obvious ridges or high spots.
- Blend uneven areas rather than flattening the entire manicure.
- Keep the file on the enhancement.
- Stop before reaching the natural nail.
The aim is to refine the product, not grind through it.
Remove all filing dust using the method specified by your system. Some kits call for a lint-free wipe; others include a particular cleansing or rinsing step. Allow the nails to dry fully before applying another liquid.
Many dip systems require a second activator application before top coat, but this is not universal. Some use a different liquid sequence or include an extra resin layer. Follow the kit rather than automatically adding or omitting a step.
Activator residue and loose powder can transfer into later bottles and affect their brushes. Wipe the nail or applicator as directed, and do not touch bottle brushes to dusty surfaces.
Apply top coat in thin, controlled layers. Many systems specify two coats and recommend sealing the free edge, but the interval and brush technique vary. Use the number of coats and strokes specified by your system, and avoid repeatedly brushing a finish once it begins to set.
Let the finish dry for the full stated period before applying cuticle oil or using your hands normally.
Complete a final check:
- The cuticle margin is even and free of product.
- The sidewalls are clean.
- The free edge is sealed if required.
- The surface is smooth without deep filing scratches.
- No area feels soft or gummy.
- No product remains on the skin.
- The top coat is fully dry before oil is applied.
Common result problems: what this technique can prevent
Application problems can have formula-specific causes. Use the following as prevention measures rather than universal diagnoses for lifting, cracking, cloudiness, or top-coat failure.
If the manicure is too thick: Apply less resin, remove loose powder completely between layers, and stop adding coats once coverage is adequate. Thin layers are easier to control than one heavy correction coat.
If the surface has ridges or lumps: Improve the evenness of the base layer and distribute powder without dragging the nail through it. After activation, smooth only obvious high points instead of filing the entire coating toward the natural nail.
If product collects around the cuticle: Leave a narrow margin and clean the perimeter before the resin hardens. Do not try to hide a flooded layer beneath another coat.
If the color looks patchy: Apply another thin coat only if the system permits it. Avoid loading the brush with a thick layer to fill isolated translucent areas.
If the top coat behaves unevenly: Confirm that filing dust has been removed, complete any required second activation, and follow the system’s wiping and top-coat timing.
If liquid brushes become gummy or hard: Avoid carrying loose powder or activator residue back into the bottle. Clean brushes only as directed and use brush saver only when it is compatible with the system.
Do not troubleshoot by mixing unrelated liquids, placing a conventional dip system under a lamp, or borrowing a fixed wait time from another brand.
A trained nail professional can assist with uncomplicated removal; symptoms or natural-nail injury warrant medical evaluation.
Safety checkpoints during application and wear
Keep resin, activator, top coat, and any gel liquid off the surrounding skin. Stop applying product if significant irritation develops.
Reported adverse-reaction signs include itching, swelling, fluid-filled bumps, persistent irritation, and new nail lifting or separation. These symptoms do not establish a specific diagnosis. Remove the product carefully and seek evaluation from an appropriate medical professional when symptoms are significant or persist. A dip-powder safety overview lists these reported signs, although it is a commercial safety article rather than a diagnostic resource.
Do not apply dip over broken or inflamed skin, suspected infection, separated nails, or substantially thinned nails. Avoid aggressive cuticle cutting and forceful cleaning beneath the nail.
Cross-contamination remains a concern even when the manicure looks neat. Do not share contacted powder, clean reusable tools appropriately, and use fresh personal portions or a pour-over method when supplies may be used by more than one person.
Repeated buffing, filing, and acetone exposure can thin or dry the nail plate and surrounding skin over time. A rigid coating may make the nail feel reinforced during wear, but it does not nourish or permanently strengthen the natural nail.
Do not assume dip is inherently healthy, nontoxic, strengthening, or appropriate for every nail condition. Formula, nail condition, application technique, removal habits, and individual reactions differ.
Lamp-cured gel-liquid powder methods have separate handling requirements. Uncured gel should be removed from the skin before curing, and the designated lamp and curing schedule should be used. Those requirements do not apply to conventional activator-hardened dip.
During wear, stop and reassess if you develop pain, inflammation, persistent itching, swelling, fluid-filled bumps, or new nail separation. Do not improvise a repair when there is significant lifting, suspected infection, or uncertainty about the condition of the natural nail.
How to remove dip powder without peeling it off
Plan removal before applying the manicure. Have the acetone specified by your system, cotton or a soaking container, foil if required, a file, a gentle pusher, and enough time to soften the coating patiently.
Begin by filing through the glossy top-coat seal. Remove the shine evenly, but do not file down to the natural nail. The purpose is to open the sealed surface so acetone can reach the underlying coating.
Two common removal methods are:
- Foil wraps: Place acetone-soaked cotton against each nail and secure it with foil.
- Soaking: Soak the nails according to the product system’s directions.
Use 100% acetone when your selected system calls for it.
Treat removal timing as a checkpoint rather than a promise. Product tutorials commonly describe initial checks after approximately 5 to 15 minutes, while broader guidance gives a range of roughly 10 to 20 minutes. Thickness, filing, and formula affect how quickly the coating softens. The iGel tutorial describes both a 10-to-15-minute foil method and an initial 5-to-10-minute soak followed by a softness check.
Check one nail after the initial interval. Properly softened product should release under gentle pressure from an orangewood stick or suitable manicure pusher. Clear only material that is already soft and detached.
If the coating remains firm:
- Replace the acetone-soaked cotton or resume soaking.
- Wait another short interval.
- Check the coating again.
- Repeat rather than increasing scraping pressure.
Do not peel, pry, or force the dip off. Pulling away attached product can remove layers of natural nail; this dip-removal overview likewise warns against picking or prying.
After the softened coating is gone, lightly refine any remaining softened residue if necessary. Do not chase every trace with aggressive filing. Shape the free edge gently, clear away residue, dry the hands, and apply cuticle oil or moisturizer. Acetone can temporarily dry the nail plate and surrounding skin.
Frequently asked questions
Do dip powder nails need a UV or LED lamp?
Conventional dip powder does not. Its resin-and-powder layers harden after liquid activator is applied.
A gel-liquid powder method is different and may require a UV or LED lamp. Use the curing method specified for the liquids in your system, and do not combine the two workflows.
How many layers of dip powder should a beginner apply?
Two thin color layers are a practical starting point. A third may be appropriate when the system permits it and the color, coverage, or desired structure requires it.
The goal is not to reach a predetermined number at any cost. Stop when coverage is even and the coating is appropriately proportioned. One heavy layer or unnecessary extra coats will be harder to refine.
Is it better to dip the nail or sprinkle powder over it?
Neither method automatically creates a better finish. Dipping into a fresh personal portion can be quick and controlled. Sprinkling over a separate catch container avoids putting the finger into the main jar and may be preferable when the powder could otherwise be shared.
In either case, cover the wet resin completely and do not return contacted powder to communal stock.
How long should activator and top coat dry?
Follow the timing printed for your system. Commercial activator instructions vary from approximately 30 seconds to several minutes, and top-coat procedures differ in coat count, interval, brush technique, and final drying time.
Do not file substantially until the coating is hard, and do not apply oil until the top coat has dried for the full system-specified period.
Can I peel off dip powder when it starts lifting?
No. Peeling can pull attached layers from the natural nail.
File through the top-coat seal and soak the product until it softens. Repeat the soak-and-check process rather than prying. If lifting is accompanied by pain, inflammation, suspected infection, nail separation, or visible natural-nail damage, stop wearing the enhancement and seek appropriate help.
The sequence to remember is simple: prepare gently, use compatible products, build thin layers, keep product off the skin, activate on the kit’s schedule, shape only after hardening, and seal as directed. At removal, soak rather than peel. Careful technique and adherence to the chosen system matter more than copying another brand’s timer—and pain, inflammation, suspected infection, significant nail damage, or a persistent reaction are reasons to stop.