
How to Soak Off a Dip Manicure Without Rushing the Process
File the glossy seal, wrap each nail in acetone-soaked cotton and foil, and check one nail first. Initial checks range from 10 to 25 minutes. Rewrap firm patches.
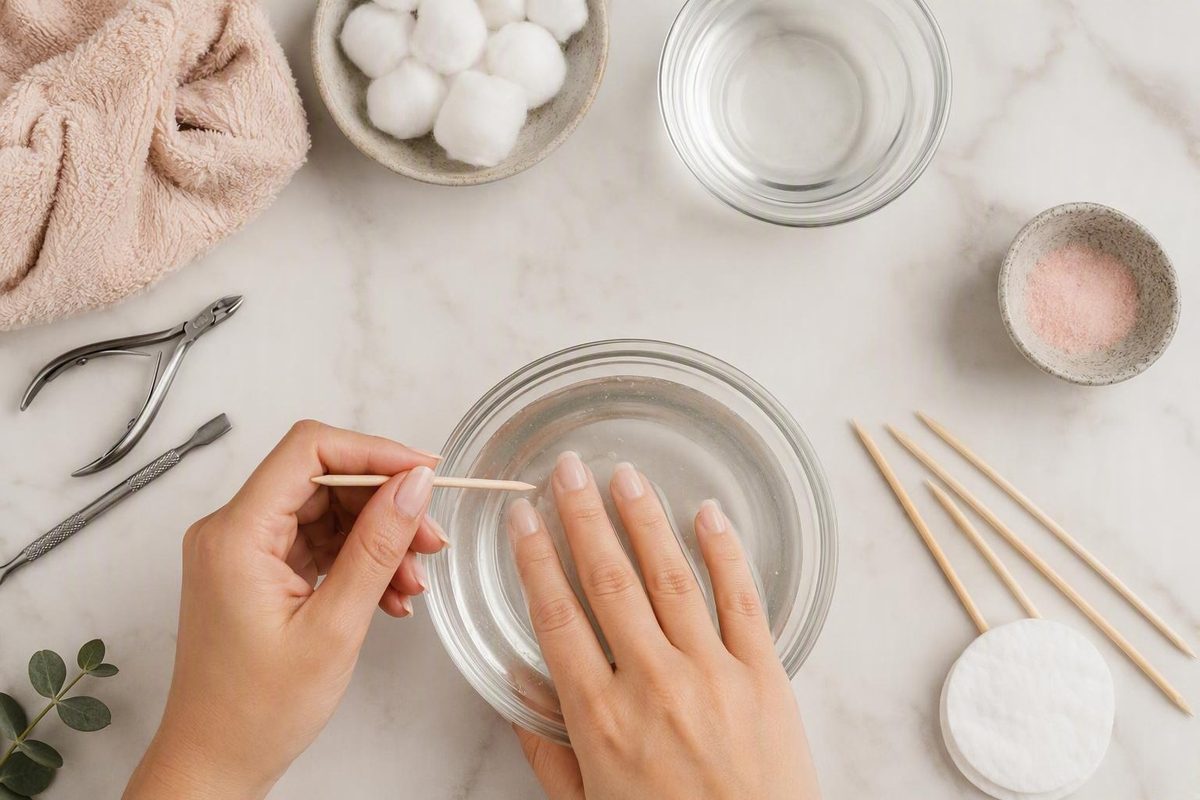
The short answer: file the seal, soak the coating, and never force it
For conservative at-home removal:
- Shorten any added length.
- Use a hand file to break the glossy top seal.
- Place acetone-saturated cotton directly on each nail.
- Secure the cotton with aluminum foil.
- Wait for the coating to soften.
- Remove only material that releases with very light pressure.
- Reapply fresh acetone-soaked cotton to every resistant patch.
The most important rule is simple: resistance means the coating is not ready. It is not a signal to scrape, pry, or file harder.
Dip manicures are difficult to wipe away because they contain durable layers of powder bonded with a resin-type adhesive. That layered structure helps explain why ordinary wiping is generally insufficient and why nail artists commonly recommend filing the surface before using acetone.
Acetone-soaked cotton secured with foil is the most consistently described home method in the available nail-brand, salon, and beauty-editorial guidance. That consistency establishes it as a common industry practice, not as a clinically proven safest method.
Published foil-wrap instructions suggest beginning to check the coating after roughly 10 to 25 minutes. Glamour Nails and Spa gives a 10-to-15-minute window, while OPI advises at least 20 to 25 minutes (Glamour Nails and Spa’s removal instructions; OPI’s dip-removal guide). These figures are estimates rather than deadlines.
Do not pick, peel, pry, or force off a lifting edge. A visible gap does not mean the whole coating has detached. Revel Nail warns that peeling still-adhered dip can remove the top layer of the natural nail and leave it thin, soft, or sore (Revel Nail’s discussion of removal risks).
Most of the detailed procedures available online come from nail-product companies, salons, retailers, and affiliate-supported beauty publications. They are useful for documenting prevailing techniques, but promotional claims about exceptional speed, superior effectiveness, safety, or damage-free removal have not been independently established in the supplied evidence.
This guide therefore takes a conservative approach: use a hand file, keep the acetone at room temperature, check one nail at a time, and rewrap any coating that does not release gently.
Supplies and workspace setup
Gather your supplies before filing. Once several fingers are wrapped, cutting foil or searching for a tool becomes unnecessarily difficult.
Essential supplies
- Nail clippers, if the manicure has added length
- A hand nail file
- Acetone
- Cotton balls or cotton pads
- Aluminum foil cut into ten squares
- A towel or another protected work surface
Optional supplies
- A buffer
- An orangewood stick or cuticle pusher
- Cuticle oil
- Hand cream
A buffer and pushing tool are not necessary for removing the main coating. If you use either one, reserve it for minor loose roughness or residue that has already softened. A tool should not be used to compensate for an incomplete soak.
Several commercial guides recommend pure or 100% acetone for dip removal, while OPI lists an acetone-based nail-polish remover. The supplied evidence does not establish that pure acetone is universally mandatory, nor does it show exactly how much longer another acetone-based formula would take. Judge progress by whether the coating has softened, not by a fixed promise attached to the remover.
Set up where there is room ventilation, such as near an open window or circulating room air. Protect the table with a towel or another suitable work surface. Revel Nail’s beginner instructions recommend a well-ventilated room and warn users not to smoke or light flames during removal (Revel Nail’s beginner removal guide).
Follow all directions and warnings on the acetone container. Commercial nail-brand guidance identifies acetone as flammable, so keep it away from smoking, flames, sparks, direct heat, and hot appliances. Do not directly heat acetone.
A practical layout is:
- Towel centered on the table
- Foil squares stacked on one side
- Nail-sized cotton pieces beside the foil
- Acetone standing upright within reach
- Clippers and file on the other side
- A clear place to rest each hand
Cut the ten foil squares before starting. Each one should be large enough to fold around a fingertip while keeping the cotton flat against the nail. Separating the cotton into pieces that cover the nail plate can make the wraps easier to position.
This article does not provide universal instructions for acetone storage, significant spills, accidental exposure, first aid, or disposal. Those requirements can depend on the product and local rules, and the supplied nail-industry material is not an authoritative chemical-safety source. Follow the product label rather than improvising a general procedure.
Preparation: shorten added length and break the glossy seal
Preparation helps the acetone reach the underlying layers. It is also the stage at which an inexperienced user can file too far, so inspect the nail frequently.
If the manicure includes extensions or substantial added length, clip that length back toward the end of the natural nail. Do not clip into the natural nail or assume that every thick area is added structure. If you cannot identify where the extension ends, leave it longer and consider professional removal.
Next, use a hand file to dull the shiny top surface. The immediate objective is to open the smooth seal so acetone can reach the product beneath it. Keep the file on the coating rather than rubbing it against the surrounding skin.
Published recommendations differ on how much product to file:
- Some instructions say to remove the glossy shine.
- Others advise reducing most of the product while leaving visible color over the natural nail.
The recommended files also vary. SNS lists an 80-to-100-grit file for its removal method, while Allure discusses a 100/180-grit file and expert use of the coarse 100-grit side to remove the seal (SNS Nails’ removal guidance; Allure’s expert removal guide). These differing recommendations are a reason not to treat one grit as mandatory for every beginner.
Whatever file you use, rely on a visible stopping point:
- The glassy topcoat should become matte.
- Thick areas may be reduced without exposing the natural nail.
- Color can remain.
- Stop when you are no longer sure whether you are looking at dip or natural nail.
Leaving more product for the acetone may extend the soak, but it is preferable to chasing every colored patch down to the natural nail. Filing should stop before the natural nail because commercial removal guides warn that over-filing can thin or injure it.
Take particular care around the cuticle and sidewalls. These areas can be difficult to see, and there is no need to eliminate every glossy speck if doing so means repeatedly rubbing the surrounding skin or an uncertain area of nail.
Beginners should not substitute an electric nail drill for a hand file. Revel Nail cautions that over-drilling can remove the top nail layer and result in thin or sore nails. The supplied evidence does not provide a beginner protocol for choosing a drill bit, speed, pressure, or stopping depth. A hand file allows more opportunities to pause and inspect the coating.
Before soaking, brush or wipe away loose filing dust without lifting or scraping the edges. The manicure should look duller and may look thinner, but it does not need to look nearly bare.
Step by step: the room-temperature foil-wrap method
This method keeps the acetone at room temperature. Some commercial tutorials introduce warmed water, rice, towels, or proprietary soaking devices, but those optional steps are not necessary for the basic foil-wrap process.
1. Prepare the wraps. Cut ten foil squares large enough to hold cotton securely against each nail. Separate cotton balls or pads into pieces that cover the nail plate.
2. Saturate the cotton. Wet each piece thoroughly with acetone.
3. Place the cotton directly on the filed coating. Center one saturated piece over the first nail.
4. Secure the cotton with foil. Fold the foil around the fingertip so the cotton stays against the nail. Repeat for the remaining nails.
Wrapping one hand at a time may be easier because the unwrapped hand remains available to position the cotton and foil. Finish the first hand, then switch.
5. Let the coating soften. The initial check times differ by publisher: Glamour Nails and Spa suggests about 10 to 15 minutes, DipWell recommends 15 to 20 minutes, and OPI advises at least 20 to 25 minutes (Glamour Nails and Spa; DipWell; OPI). None of these windows guarantees that every manicure will be ready.
Check one nail first and leave the other wraps in place. OPI notes that exposed product may reharden, so unwrapping every finger at once can make the remaining nails more difficult to assess and clean.
6. Test the first wrap. Gently roll or twist the foil and cotton as you remove them. Look at the product before reaching for a tool.
Coating that is ready to release may appear:
- Flaky
- Gummy
- Cracked or crumbled
- Lifted in soft pieces
- Loose enough to move with very light pressure
If most of it comes away with the cotton or shifts without effort, continue gently. If it remains hard, looks largely unchanged, or stays firmly bonded, stop and rewrap it.
7. Remove only softened material. Use the cotton to wipe or roll away loose product.
The tool is not a pry bar. Do not dig under a firm edge, gouge the surface, or repeatedly scrape a resistant patch. If the product does not move almost immediately under very light pressure, return to acetone.
8. Work nail by nail. Keep the untested wraps in place. Remove one wrap, clear what releases, and rewrap that nail if necessary before moving to the next.
Removal is complete only when the coating has been cleared without force. A firmly bonded patch is not a finished result: it needs another soak or professional removal. Slight surface unevenness does not justify aggressive filing or buffing.
Timing and troubleshooting stubborn dip powder
There is no dependable universal removal time. The published instructions differ, and individual results can vary with filing depth, coating thickness, adhesion, remover formula, and how consistently the cotton touches the nail.
Troubleshoot according to what you see and feel rather than treating the timer as a deadline.
If the coating is still glossy
The top seal may not have been opened sufficiently. Remove the wrap and identify whether the shine is on remaining product rather than exposed natural nail. Gently dull only the glossy coating, then apply fresh acetone-saturated cotton and rewrap it.
Do not file an area if you cannot tell whether it is product or natural nail.
If some areas are soft but others are hard
Wipe away only what releases readily. Do not use the softened area as an entry point for peeling up the rest.
Place fresh acetone-soaked cotton over the resistant section and secure the foil again.
If the entire layer remains firm
Continue soaking rather than prying. Check whether the cotton is still wet and directly touching the whole coating. Replace it if it has dried or moved.
DipWell suggests an additional five-minute soak when product remains after the initial period (DipWell’s foil-wrap tutorial). Treat five minutes as a practical recheck interval, not a guaranteed finishing time. A thick or minimally filed manicure may require more than one rewrap.
If the coating becomes gummy and smears
Use saturated cotton to roll or wipe the softened residue instead of scraping it. Apply a fresh piece to anything that remains.
If only a thin film remains
Use fresh acetone-soaked cotton for light cleanup. After washing and drying the hands, a buffer may be used sparingly on minor loose roughness. Stop once that loose texture has been smoothed; do not continue buffing solely to make the nail appear perfectly uniform.
If you cannot tell where the product ends
Stop filing and scraping. Without a clear boundary, you cannot reliably judge the stopping point. If the area is obviously coated and firm, another wrap may help. Otherwise, ask a nail professional to assess the remaining material.
If repeated soaking does not produce gentle release
Professional removal is the appropriate next step. More filing, pressure, or scraping is not automatically better.
Stop as a precaution if removal becomes uncomfortable or the condition of the nail or surrounding skin concerns you. This guide cannot determine whether a change represents irritation, injury, nail separation, allergy, infection, or another condition. Seek individualized guidance rather than immediately covering a concerning area with another manicure.
Foil wraps, bowl soaks, warmed bags, or salon removal?
Commercial tutorials describe several ways to bring acetone into contact with the coating. They differ in how much of the fingertip touches acetone, whether the nails are rubbed against absorbent material, and whether optional warmth is introduced.
The available evidence does not establish any one method as universally safest, fastest, easiest, or damage-free.
| Method | How it works | Observable tradeoffs | When to consider it |
|---|---|---|---|
| Room-temperature foil wraps | Acetone-saturated cotton is placed on each filed nail and secured with foil. | Treats each nail separately; wraps can be awkward to apply; individual resistant nails can be rewrapped. | When you want a commonly documented method without optional warming. |
| Bowl or bag soaking | Fingertips contact acetone in a bowl or a bag containing saturated material. Some bag instructions involve rubbing the nails against cotton or another absorbent surface. | More of each fingertip may contact the remover; rubbing can add mechanical pressure if the coating is still firm. | When you understand the method and are prepared to stop rubbing if the product resists. |
| Indirectly warmed bowl or bag | Commercial tutorials place an acetone container or bag near warmed water or rice rather than heating the acetone directly. | Adds temperature and handling considerations; claims of much faster removal lack independent comparison in the supplied evidence. | Not required for the room-temperature process described here. |
| Professional removal | A nail technician assesses and removes the remaining coating. | Requires an appointment and payment but avoids asking the user to make every filing and readiness judgment alone. | When filing feels uncertain, the coating remains resistant, or the nail or skin is concerning. |
Foil wraps are the most consistently documented option in the supplied material. They keep cotton positioned on individual nails and allow one resistant patch to be rewrapped without unwrapping or immersing every finger. This practical difference does not prove that foil is superior to every alternative.
Some bag methods instruct users to move or rub their nails against acetone-soaked cotton or another insert. Rubbing should stop if the product remains firm; friction is not a substitute for adequate softening.
Commercial brands also promote indirect warming. Rossi Nails, for example, demonstrates a bag placed in warmed rice and claims removal in approximately 5 to 10 minutes. The brand-produced tutorial does not provide independent comparative evidence showing that this is faster or safer than room-temperature foil wraps (Rossi Nails’ warmed-rice tutorial).
Do not directly heat acetone. Revel Nail states that acetone is flammable and should not be heated directly; its guidance also warns against flames and smoking (Revel Nail’s acetone-removal guidance). Follow the acetone label and the workspace precautions described earlier. The room-temperature method avoids introducing optional warming, but that is not proof that it is universally safest.
Choose professional removal when:
- You are uncomfortable filing the top layer.
- You cannot distinguish dip from the natural nail.
- The coating remains firmly attached after repeated soaking.
- Removal becomes uncomfortable.
- The nail or surrounding skin already concerns you.
- Finishing at home would require peeling, forceful scraping, or uncertain filing.
Stopping is not a failed removal. It is the appropriate response when continuing would require more force or less certainty.
Common mistakes that can turn removal into nail damage
Picking or peeling lifting edges
A lifted corner may still be attached elsewhere. Do not tug or peel it. Return to filing the seal and soaking, then remove only what releases gently.
Filing until every trace of color disappears
Visible color does not prove that preparation is incomplete. The objective is to open the glossy seal and, if desired, reduce some bulk. Stop before the natural nail.
Using a pusher as a lever
An orangewood stick or cuticle pusher is for softened residue. If you need to wedge it under the coating or apply significant pressure, the coating is not ready.
Treating a published time as a deadline
A stated soak period tells you when to begin checking. It does not mean the product must be forced off when the timer ends. Rewrap any hard patch.
Unwrapping every nail at once
Check one nail first. Keeping the other wraps in place preserves cotton contact while you determine whether the coating is ready.
Allowing the cotton to shift or dry
A loose wrap can leave part of the coating without direct contact. Reposition or replace the cotton before assuming the product itself is unusually resistant.
Improvising direct heat
Do not microwave acetone, put it on a stove, or place it beside a flame or hot appliance. Use the room-temperature method and follow the product label.
Relying on promotional speed claims
A branded bowl, bag, towel, warming technique, or removal device does not eliminate the need to file cautiously and wait for the coating to soften. Claims such as “fastest,” “most effective,” or “damage-free” require independent evidence that is not present here.
Using an electric drill without the necessary control
An electric file removes material quickly. The available guidance warns about over-drilling but does not establish a reliable beginner standard for bit selection, speed, pressure, or stopping depth. Use a hand file or arrange professional removal.
Buffing for cosmetic perfection
Freshly uncovered nails may not look completely smooth. Buff only minor loose roughness. Do not repeatedly abrade the nail to remove every ridge or variation.
Continuing despite discomfort or uncertainty
Stop if the process is uncomfortable, you cannot tell what you are filing, or the nail or surrounding skin worries you. A nail professional can address resistant coating; a qualified healthcare professional can give individualized advice about a concerning nail or skin condition.
Aftercare for acetone-dried nails and skin
Once all coating that can be removed gently is gone, wash and dry your hands. This clears away filing dust and softened residue and makes it easier to inspect the nail without immediately reaching for another tool.
Look at each nail in good light. Minor unevenness does not necessarily mean that more dip must be scraped away, and a perfectly polished-looking natural surface is not the goal.
If there is minor loose roughness, smooth it lightly with a buffer. Stop early rather than continuing until the entire surface looks uniform.
Apply cuticle oil around the nails and follow with hand cream. Commercial nail-industry sources commonly recommend these steps after acetone removal because the nails and surrounding skin may feel temporarily dry. Treat oil and moisturizer as comfort and moisture-replacement measures, not as guarantees against irritation or nail damage.
Some brands also recommend nail-strengthening treatments after removal. The supplied evidence does not establish that these products repair, restore, or heal the natural nail, so a strengthener should be regarded as optional rather than essential.
There is also no well-supported universal waiting period before another manicure in the supplied evidence. Base the decision on how the nails and surrounding skin look and feel rather than an arbitrary number of days. If an area is uncomfortable or concerning, seek individualized guidance instead of immediately concealing it beneath another coating.
Aftercare has a limited role.
Do I need 100% acetone to remove dip nails at home?
Pure or 100% acetone is commonly recommended in commercial dip-removal guides, but OPI specifies an acetone-based nail-polish remover. The evidence therefore does not support saying that pure acetone is universally mandatory.
Nor is there a reliable basis for promising how much longer another acetone-based formula will take. Whichever formula you use, follow its label, keep the cotton in contact with the coating, and judge readiness by softness.
How long should dip nails soak in acetone before I check them?
Use the initial check windows given in the step-by-step method as estimates, not completion guarantees. Check one nail first and leave the others wrapped.
If the coating is flaky, gummy, or loose and moves with very light pressure, remove the softened material. If it remains hard or firmly attached, apply fresh acetone-soaked cotton and rewrap it.
Why is my dip powder not coming off after soaking?
The glossy seal may not have been opened sufficiently, the coating may be thick, or the cotton may have shifted or dried. The manicure may also be strongly adhered.
Check the cotton contact and gently dull only clearly visible glossy product. Do not file an uncertain area. Reapply fresh saturated cotton and continue soaking rather than responding with stronger scraping.
If repeated wraps do not produce gentle release, or you cannot distinguish the coating from the natural nail, have a nail professional finish the removal.
Is a warmed bag or bowl faster than foil wraps?
Some nail brands claim that warmed bags, rice, water, towels, or proprietary bowls shorten removal. The supplied material does not include independent comparative evidence establishing that a warmed method will work faster for a particular manicure.
This guide uses room-temperature foil wraps to avoid adding an optional warming step. Follow the acetone label and the handling precautions in the workspace section rather than improvising heat.
Can I peel off dip nails once they start lifting?
No. A lifted edge may remain attached elsewhere, and peeling can remove the top layer of the natural nail. SNS specifically warns that forcing off dip may leave nails weak or brittle (SNS Nails’ at-home removal guidance).
File the glossy seal, soak the coating, and remove only what releases with very light pressure. Rewrap every firm patch.
Patience is the main protection during removal. Break the glossy seal without reaching the natural nail, maintain the acetone-label and ignition precautions described above, and let softness—not the clock—determine when the coating is ready. Moisturize afterward for temporary dryness, and choose professional removal whenever the product will not release gently or the condition of the nail or surrounding skin raises concern.