
True Gel Won’t Air-Dry—Here’s How to Choose the Right No-Lamp Option
Conventional photocurable gel will not properly cure when left overnight. A formula labeled "air-dry" or "no lamp needed" is designed to set in air.
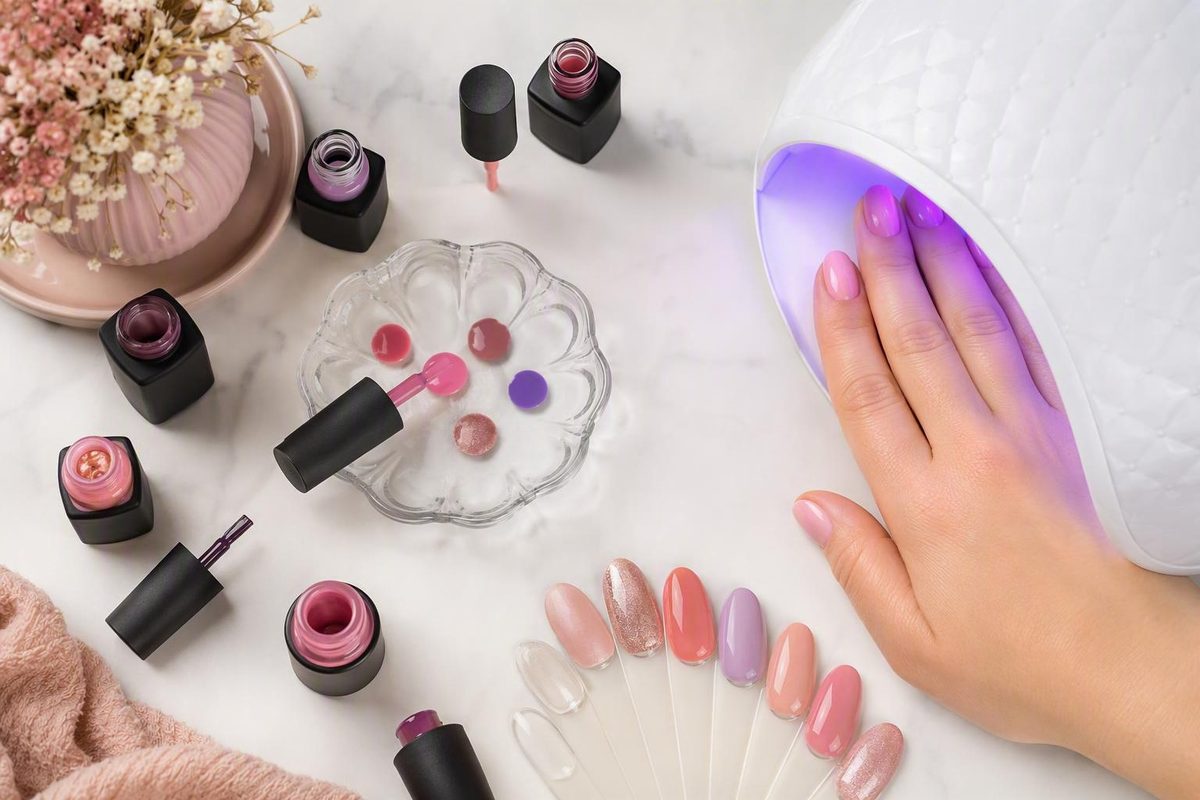
The short answer: it depends on which kind of “gel” is in the bottle
Conventional gel polish will not properly cure simply by being left in the air. If the formula is designed for light curing, it needs the compatible UV or LED nail lamp specified by its manufacturer. Waiting overnight, cooling the nails, or spraying the surface does not replace that curing step. Dashing Diva’s product guidance, for example, distinguishes conventional gel from regular polish and says gel requires suitable UV wavelengths to harden (Dashing Diva’s explanation of gel curing).
A product can dry without a lamp when it is specifically formulated and labeled as one of the following:
- Air-dry polish
- No-lamp polish
- No-UV-needed polish
- Gel-effect or gel-like polish that dries in air
The confusion comes from the word “gel.” It appears on products that use different setting mechanisms. One bottle may contain a photocurable formula that remains soft until exposed to suitable light. Another may behave more like conventional nail polish while promising a plump, glossy, gel-like finish. The marketing name on the front of the bottle does not reliably identify which type you own.
For practical purposes, divide these products into two categories:
- True light-cured gel: The directions tell you to cure the base, color, top coat, or each individual layer under a UV, LED, or UV/LED nail lamp.
- Lamp-free gel-effect polish: The directions tell you to let the coats dry or set in air and may expressly say that no lamp or UV light is needed.
Uncured conventional gel may remain wet, soft, tacky, movable, or easily dented. It may also appear firmer at the surface without developing its intended structure underneath. A genuine no-lamp formula, by contrast, is intended to form a coating as it sits in the air.
The label rule: If the directions use the word “cure,” name a UV or LED lamp, or provide a lamp time for each layer, do not treat the product as air-drying polish.
Do not assume that “gel” automatically means a lamp is required, but do not assume that “gel-like,” “non-UV,” or a familiar bottle shape proves that no lamp is needed. The application directions—not the branding—decide the answer.
Drying and curing are not the same process
“Dry” and “cure” are often used as though they mean the same thing. When choosing or troubleshooting a nail product, the distinction matters:
- Air-drying polish dries as volatile ingredients leave the coating and a film develops.
- Conventional gel cures through a reaction initiated by suitable light.
Commercial gel manufacturers and retailers describe regular polish as forming its coating through solvent evaporation. Its surface may become touch-dry before deeper layers are fully set, which is why an apparently dry manicure can still smudge or dent.
Their account of conventional gel is different. These sources describe gel as containing light-responsive components called photoinitiators. When those components receive suitable wavelengths from a compatible nail lamp, they initiate polymerization, linking the material into a hardened coating. Mylee’s manufacturer guidance also warns that a thick layer can remain soft beneath a hardened surface (Mylee’s guide to UV and LED nail lamps).
That is why simply waiting does not solve the problem for true gel. Air exposure does not provide the light-triggered step for which the formula was designed. Cooling the coating is not a substitute either. A household method might alter how the surface feels, but it does not reproduce a compatible curing cycle.
It helps to distinguish three states that can look deceptively similar:
- Touch-dry: The surface does not immediately transfer when touched.
- Fully set: An air-drying coating has developed enough throughout to resist ordinary smudging and denting.
- Cured: A photocurable gel has received the specified light exposure and completed its intended hardening process to the extent expected by that product system.
A surface that looks glossy or feels less wet does not prove that the entire gel layer has cured. Light must reach through the applied material. A coat that is too thick—or one with dense pigmentation—may look firm on top while remaining soft underneath. Visual inspection alone cannot confirm a complete cure.
This distinction prevents a common category error. An air-dry gel-effect polish is not failed conventional gel; it is a different product designed to set by a different route. Likewise, true gel that stays wet without a lamp is not merely taking longer than regular polish. It is missing the process its formula requires.
For supplementary background, see this overview of how gel nail polish cures and differs from regular polish. For product decisions, however, rely on the instructions supplied with the exact polish and lamp you intend to use.
Use this label-reading decision tree before applying anything
Begin with the back-label directions, box insert, or manufacturer’s product page. Do not begin with the bottle shape, texture, price, or prominent use of the word “gel.”
Step 1: Do the directions specify UV, LED, or UV/LED curing?
If yes, classify the product as conventional light-cured gel.
Look for language such as:
- “Cure under LED”
- “Cure under UV/LED”
- “Cure each coat”
- “Place under lamp”
- Separate lamp times for base, color, and top coat
Next, identify the lamp the manufacturer specifies. A direction to use an LED lamp does not mean that any device containing LEDs will work. Check whether the formula requires a particular lamp type, wavelength range, product system, or exposure instruction.
Apply every layer as directed. If the system calls for separate base, color, and top coats, do not assume that one of them is optional unless the product explicitly says so.
Step 2: Do the directions explicitly say air-dry or no lamp?
If the label says “air-dry,” “no lamp needed,” “no UV needed,” or provides ordinary waiting instructions without a curing stage, treat it as a lamp-free formula.
Follow its specific directions for:
- Number and thickness of coats
- Waiting between coats
- Whether a dedicated base coat is needed
- Whether a matching or compatible top coat is required
- When the manicure will be fully set
- How the coating should be removed
Retail descriptions often use “gel-effect” for products intended to imitate some visual qualities of gel while drying more like regular polish, but the terminology varies. Reforma’s commercial guide makes this distinction while emphasizing label instructions (Reforma’s comparison of traditional gel and no-lamp polish).
Step 3: Are the directions missing or ambiguous?
Do not guess.
Search for the exact product name, shade line, or item number on the manufacturer’s website. If necessary, ask the manufacturer whether the formula is:
- Air-drying
- UV-curable
- LED-curable
- Compatible with both UV and LED nail lamps
- Intended for a specific branded lamp or system
Terms such as “non-UV gel,” “no-light gel,” and “gel-effect” are not used consistently enough to prove what is in the bottle. One brand may use “no-light” for a solvent-based color with a glossy finish, while another may apply unfamiliar wording to a multi-step system. Missing lamp instructions are not, by themselves, a dependable invitation to experiment.
Before using an unfamiliar product, run through this checklist:
- Product type: Light-cured gel or air-drying polish?
- Base coat: Required, optional, built in, or incompatible?
- Color layers: How thin, and how many?
- Top coat: Matching gel top coat, air-dry top coat, or none?
- Lamp: UV, LED, UV/LED, or no lamp?
- Compatibility: Does the manufacturer name a tested device or system?
- Per-layer process: Cure or wait after each coat?
- Final surface: Cleanse an inhibition layer, or leave a no-wipe top coat alone?
- Removal: Soak, ordinary polish remover, peel, or another specified process?
Reading the full directions takes longer than glancing at the front label, but it is much faster than troubleshooting a manicure made from incompatible products.
An LED nail lamp is an alternative device, not a UV-free cure
An LED nail lamp may be an alternative to a traditional fluorescent UV nail lamp—but only when the gel formula is compatible with it.
The important distinction is between the device technology and the light used for curing. “LED” describes how the lamp produces light. Compatible LED nail lamps still emit ultraviolet wavelengths that activate suitable photoinitiators, so LED curing should not be described as UV-free.
Traditional UV lamps generally produce a broader spectrum, while LED nail lamps target narrower wavelength ranges. A gel may therefore be:
- Designed primarily for a traditional UV lamp
- Designed for a compatible LED lamp
- Compatible with both
- Tested only as part of a particular manufacturer’s lamp-and-product system
Several factors may affect whether a gel layer cures as intended:
- The gel formula and its photoinitiators
- Lamp wavelength or spectrum
- Light intensity at the nail
- Product-specific exposure time
- Layer thickness
- Shade and pigment density
- Position of the hand in the lamp
- Condition of the lamp
- Manufacturer testing of the product-and-lamp combination
Young Nails’ manufacturer troubleshooting guidance advises checking whether the polish is labeled for UV, LED, or both. It also identifies product thickness, exposure, lamp compatibility, lamp condition, and product condition as possible causes of curing problems (Young Nails’ guide to gel that does not cure).
This is why wattage alone is not proof of compatibility. A higher wattage number does not establish that a device supplies the wavelength distribution and nail-level output a particular formula requires. Nor do the words “professional,” a large number of LEDs, or a preset timer prove that the lamp has been tested with your polish.
More time is not a universal fix. If the lamp and formula are mismatched, extending the cycle does not necessarily correct an unsuitable spectrum or inadequate intensity. It may also create false confidence if the surface looks hard while lower material remains insufficiently cured.
Use the lamp recommended by the polish manufacturer when that information is available. Follow the exposure instructions for each layer rather than borrowing a curing time from another brand, a social-media tutorial, or a different type of gel. There is no single curing time that applies to every formula, shade, layer, and lamp.
Why ice water, fans, sprays, and hair dryers cannot cure true gel
Household drying tricks are often suggested when someone has already applied gel and discovers that no lamp is available. These methods do not replace the product-specific light required by conventional gel.
Ice water
Cold water may temporarily make a coating’s surface feel firmer. It does not activate the photoinitiators in conventional gel or establish that the material has cured throughout. A cool, firmer-feeling surface can still conceal soft material below.
Ice-water advice is often borrowed from discussions of regular polish. Although some commercial guides suggest it as an aid for air-drying formulas, the supplied evidence does not establish a dependable reduction in setting time. In any case, a proposed drying aid for regular or no-lamp polish should not be treated as a way to cure true gel.
A fan or cool airflow
Air movement may affect evaporation conditions for a solvent-based polish. Conventional gel does not harden through ordinary solvent evaporation, so a fan cannot supply its missing light-triggered step.
The same principle applies to blowing on the nails or holding them in front of an air conditioner. A change in surface feel is not evidence that the gel has polymerized as intended.
A hair dryer
Hot air does not transform light-cured gel into an air-drying product. A cool setting is still only airflow. Neither setting supplies the controlled, compatible UV output specified for a gel manicure.
A hair dryer may be discussed in instructions for certain air-drying products, but those directions cannot be transferred to conventional gel.
Quick-dry drops or spray
Quick-dry products are intended for compatible air-drying polish systems. They may affect the surface behavior or solvent-based setting process of those products, but they cannot activate the photoinitiators in conventional gel.
V Beauty Pure’s commercial guide distinguishes non-UV polish from traditional gel and notes that quick-dry spray or cold water does not replace light curing for conventional gel (V Beauty Pure’s label-based guidance).
Sunlight and household bulbs
Do not treat direct sunlight or an ordinary household bulb as a dependable substitute for the specified nail lamp. The available product guidance does not establish either method as a reliable, even, or manufacturer-approved cure. Uncontrolled exposure is not equivalent to following a tested product-and-lamp process.
The practical rule is simple: If the product requires a lamp, it needs the specified compatible lamp—not a drying hack.
What to do if you already applied gel without a lamp
If conventional gel is still wet or soft on your nails, do not keep waiting in the expectation that it will eventually air-dry.
Check the bottle, package insert, or manufacturer’s website for the exact product. Follow its instructions for an interrupted application, if provided, or contact the manufacturer for product-specific guidance.
Do not assume that one removal or rescue method is correct for every uncured product. Gel polish, builder products, peel-off systems, and other gel-family coatings may have different instructions. Directions written for removing a finished manicure may also not address a wet or partly handled application.
Likewise, do not rely on the following as substitutes for a verified cure:
- Direct sunlight
- A household light bulb
- Ice water
- A fan
- A hair dryer
- Quick-dry spray
- An unverified craft or nail lamp
If you obtain the correct compatible lamp, return to the manufacturer’s complete system instructions rather than inventing an exposure time. This does not mean that every partly handled application can necessarily be completed as though nothing happened. Dust, lint, movement, wrinkling, or other changes may affect what the manufacturer recommends next.
It is also important to distinguish surface tack from obvious curing problems.
Some gel systems intentionally leave a tacky surface called an inhibition layer after the prescribed cure. Depending on the system, that layer may remain between coats and be cleansed only after the final top coat. A no-wipe top coat is formulated so that final cleansing is not expected. The product directions should identify which behavior is normal.
Possible signs of incomplete curing include:
- Softness below the surface
- Wrinkling
- Dents that remain
- Bubbling or shriveling
- Color that moves under pressure
- A layer that slides on the nail
- Obvious wet material beneath a firmer surface
Thick or highly pigmented coats deserve particular attention because light may not travel through them as effectively. Professional troubleshooting guidance identifies excessive thickness, unsuitable curing units, insufficient product-specific exposure, poor hand placement, and deteriorating lamps as recurring curing problems (Paola Ponce Nails’ overview of curing mistakes).
Appearance alone cannot establish that the full depth is cured. If the exact instructions do not address the situation, ask the manufacturer rather than improvising a universal remedy.
Lamp-free alternatives and the trade-offs to expect
If you do not want to buy or use a nail lamp, choose a product designed around that preference. Do not buy conventional gel and then try to convert it into an air-drying manicure.
| Product category | How it sets | Lamp needed? | How to verify | Likely finish characteristics | Removal |
|---|---|---|---|---|---|
| Conventional gel polish | Cures through a light-triggered reaction | Yes | Directions specify UV, LED, or UV/LED curing | Often smooth, glossy, and structured when properly applied and cured | Follow the gel system’s stated removal procedure |
| Air-dry gel-effect polish | Sets in air, generally more like conventional polish | No | Look for explicit “air-dry,” “no lamp,” or “no UV needed” directions | May provide a plumper or glossier gel-inspired appearance | Use the removal method stated for that formula |
| Regular polish with a compatible glossy top coat | Sets as the air-drying layers form a film | No | Both color and top coat should provide ordinary drying instructions | Glossy; the top coat may add surface protection but does not create cured gel | Follow the color and top-coat directions |
| Wraps explicitly labeled no-lamp | Adhere or set according to the wrap system | Not if genuinely labeled no-lamp | Check the exact product rather than relying on the word “wrap” | Can provide even color or printed designs without liquid-polish application | Follow the wrap maker’s removal instructions |
Air-dry gel-effect polish is primarily a visual and convenience alternative. It may imitate the shine, rounded appearance, or coordinated base-and-top-coat routine associated with gel, but it is not necessarily chemically equivalent to photocurable gel.
Regular polish with a compatible gel-effect top coat is another straightforward option. The top coat may increase gloss and provide some protection to the color underneath. It does not add a light-curing mechanism or turn the manicure into conventional gel.
Avoid universal promises about setting time or wear. Both vary with the formula, coat thickness, environment, nail preparation, application, and how the hands are used. The phrase “gel-effect” does not prove that a polish will wear as long as properly cured conventional gel.
Wraps require especially careful label reading. Some nail-polish wraps are explicitly lamp-free, while products described as semi-cured gel wraps may require a final light-curing step. Polish Pops distinguishes between these categories in its commercial comparison, illustrating why the individual directions matter more than the broad word “wrap” (Polish Pops’ comparison of wraps and light-cured options).
For a no-lamp manicure, use this general framework while deferring to the product’s directions:
- Prepare the nails as directed. Remove any old coating and follow the formula’s instructions concerning clean, dry nails and base coat.
- Apply thin, even coats. Thick air-drying layers can remain vulnerable below the surface even when the top feels dry.
- Observe the specified wait between coats. Do not cover a still-mobile layer merely because it no longer transfers immediately.
- Use only a compatible top coat. A light-cured gel top coat cannot be made lamp-free by placing it over regular polish.
- Allow the manicure to become fully set. Touch-dry does not necessarily mean ready for pressure or detailed hand work.
- Follow the stated removal process. Do not assume that every product containing the word “gel” should be removed in the same way.
The choice is not simply “lamp versus no lamp.” You are choosing between different setting mechanisms, application systems, finishes, and removal requirements. Pick the mechanism that suits the equipment you actually intend to use.
Troubleshooting a manicure that is sticky, wrinkled, or dentable
Not every sticky gel manicure has failed. Diagnose the symptom in context rather than treating tackiness alone as proof of under-curing.
The surface is tacky, but the layer underneath feels firm
Check whether the product expects an inhibition layer. Some systems leave a tacky film after the prescribed cure, particularly between layers. The instructions may say to leave it in place until the top coat is complete and then cleanse it. If the final product is labeled no-wipe, persistent tackiness is less likely to be expected.
Do not cleanse between coats unless the product system instructs you to do so. Manufacturer and retailer troubleshooting guidance says that the expected inhibition layer may support adhesion between gel layers.
The coating is soft, movable, or dentable
This is more concerning than surface tack alone. Softness beneath the top may indicate that light did not penetrate the layer sufficiently or that the lamp did not provide an appropriate cure.
Potential causes identified in commercial troubleshooting guidance include:
- Coats applied too thickly
- Dense or highly pigmented color
- Insufficient exposure for the exact product
- A lamp incompatible with the gel
- Weak or degraded lamp output
- Poor hand placement
- Product that is expired, separated, or contaminated
Do not simply double a generic lamp time and assume the problem is solved. If compatibility is wrong, more time under the same device may not correct a wavelength or intensity mismatch.
The gel is wrinkled, bubbled, or shriveled
These symptoms may occur when the surface responds to the lamp while deeper product remains mobile. Thick coats are a common concern. Consult the manufacturer’s troubleshooting and reapplication directions instead of trying to hide the problem beneath another coat.
Adding top coat over a visibly failed color layer does not establish that the material below has cured.
The thumbs or sidewalls remain softer than the other nails
Consider hand placement. Fingers should sit where the lamp is designed to illuminate them rather than curling away from the light. Thumbs may require a different position or separate curing approach if the system’s instructions say so.
Follow the lamp’s placement instructions and keep each nail oriented as intended.
The same product used to cure correctly but now does not
Check both the lamp and the bottle. Commercial troubleshooting sources identify declining lamp output and expired, separated, or contaminated polish as possible causes of curing problems. Confirm that the product was stored and mixed as directed. If the problem persists, contact the manufacturer rather than relying on visible brightness or wattage as a home test.
A dark shade fails while a sheer shade seems fine
Pigment density can affect how light travels through the applied material. Keep coats thin and follow shade-specific instructions if the brand provides them. A successful result with one color does not prove that every shade will behave identically at the same application thickness.
ProNails Selfcare’s retailer guidance similarly warns that thick layers can remain soft beneath the surface and emphasizes thin coats, correct placement, suitable light, and brand-specific instructions (ProNails Selfcare’s guide to common gel-polish mistakes).
If you cannot verify the polish directions, lamp compatibility, or expected final surface, pause. A manufacturer-specific answer is more dependable than a universal rescue routine.
Frequently asked questions
Will gel polish cure if I leave it overnight?
Conventional photocurable gel will not properly cure merely because it has been left overnight. Waiting provides time, but it does not provide the suitable UV wavelengths needed to initiate the formula’s intended reaction.
An explicitly labeled air-dry or no-lamp polish can set overnight because it was formulated to dry without a lamp. Check whether the directions say dry or cure. If they specify a lamp, extra waiting is not a substitute.
Does an LED nail lamp count as a UV light?
A compatible LED nail lamp emits ultraviolet wavelengths used to cure suitable gel formulas. “LED” refers to the device’s light-producing technology; it does not mean that the curing process is UV-free.
However, an LED lamp does not automatically work with every gel. Confirm that the polish is labeled for that lamp type or that the manufacturer identifies the device as compatible.
Can a hair dryer, fan, ice bath, or quick-dry spray cure gel polish?
No. These methods do not provide the product-specific UV light needed to cure conventional gel.
Airflow, cold water, or quick-dry products may affect the surface or setting conditions of certain air-drying polishes. That should not be confused with curing a photocurable gel layer. If the product requires a lamp, use the specified compatible lamp.
Why is my gel still sticky after using a lamp?
It may have a normal inhibition layer. Check whether the directions call for cleansing after the final coat or describe the top coat as no-wipe.
If the gel is soft beneath the surface, wrinkled, dentable, bubbled, or movable, possible causes include thick coats, inadequate product-specific exposure, an incompatible or degraded lamp, poor hand placement, or deteriorated product. Follow the manufacturer’s troubleshooting instructions rather than assuming that all stickiness has the same cause.
Can a UV or LED nail lamp dry regular nail polish?
Regular polish is not cured by a UV or LED gel lamp and does not become gel when placed under one. It should be allowed to air-dry according to its own directions.
The final rule is the one printed in the application instructions, not the word “gel” on the front. If the product calls for UV or LED curing, it needs the specified compatible lamp and will not properly cure through extra waiting or household drying tricks. If avoiding a lamp is the priority, choose a product that explicitly says air-dry or no lamp needed, then follow that formula’s application, setting, and removal instructions.